Friday, October 28, 2022

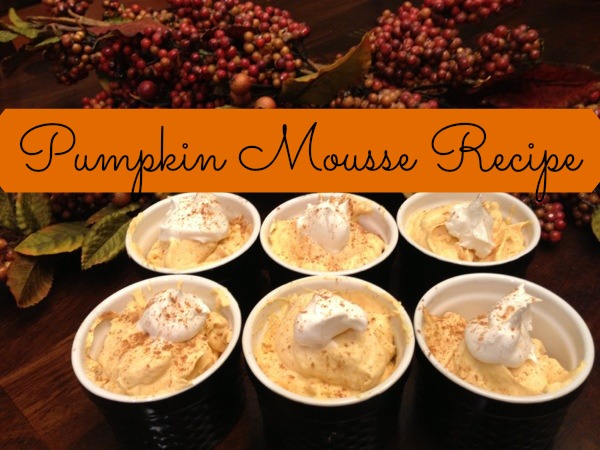
Easy Gluten Free Thanksgiving Dessert: Pumpkin Mousse Recipe


Check out ClassyMommy.com for more gluten free recipes!

Pumpkin Mousse Recipe Ingredients

  • 1 box of vanilla instant pudding and pie filling mix
  • 1/4 teaspoon pumpkin pie spice (Alternatively you can use Cinnamon – but any version of Pumpkin Pie Style spices taste best!)
  • 2/3 cup Evaporated Fat Free Milk (Small 5 fl. oz can)
  • 1 cup LIBBY’S 100% Pure Pumpkin – (This is about 2/3 of a can)
  • 2 1/2 cups thawed fat-free frozen whipped topping

Pumpkin Mousse Preparation Directions

  1. Mix together your dry ingredients first – the pudding mix and pumpkin spice.
  2.  Next, using a whisk, add in your evaporated milk. Mix well.
  3.  Add in your Libby’s pure pumpkin and stir everything well.
  4.  Finally add your thawed out whipped topping.
  5.  I recommend 2 1/2 cups of whipped topping as I find the pure pumpkin very rich.You can add more or less to taste if you’d prefer but my family likes this ratio best.
  6. After you scoop the pumpkin mousse into serving cups, top with a dollop of whipped cream and sprinkle more cinnamon or pumpkin spice on top.


Thursday, March 25, 2021

Wednesday, March 24, 2021

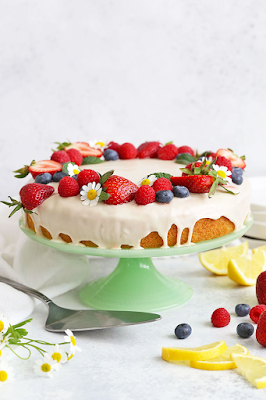
Gluten Free Lemon Cake

 3x

Gluten Free Lemon Cake


For the Lemon Cake:

  • 1/2 cup milk (I use unsweetened almond milk)
  • 3 Tbsp lemon juice
  • 3/4 cup sugar (I used organic cane sugar)
  • 2 Tbsp lemon zest (about 2 lemons’ worth)
  • 1/2 cup avocado oil (can sub melted coconut oil, butter or vegan butter)
  • 3 eggs
  • 1/2 tsp vanilla extract
  • 1 3/4 cup gluten free all purpose flour baking blend (like Bob’s Red Mill 1-to-1 Baking Flour)
  • 1 1/2 tsp baking powder
  • 1/4 tsp baking soda
  • 1/2 tsp salt

For the Lemon-Honey syrup:

  • 1 Tbsp honey
  • 2 Tbsp lemon juice

For the Lemon Glaze:

  • 1 Tbsp lemon juice
  • 2 Tbsp milk (I use almond milk)
  • 1/2 tsp vanilla
  • 2 cups powdered sugar, sifted (I measure, then sift)

INSTRUCTIONS

For the cake:

  1. Preheat oven to 350 degrees. Grease a 9″ cake pan with spray oil and line the bottom with a parchment paper circle*
  2. In a liquid measuring cup (or a small bowl), combine lemon juice and milk. Let sit for about 5 minutes.
  3. While the lemon juice and milk is sitting, rub lemon zest into the sugar in a large bowl. This gets the lemon oil into the sugar and distributes the flavor really well.
  4. Add milk mixture, avocado oil, eggs, and vanilla. Whisk until well combined.
  5. In a medium bowl, stir together flour blend, baking powder, baking soda, and salt. Stir the dry ingredients into the wet ingredients and mix until just combined. (Or you can simply sprinkle the dry ingredients over the wet before stirring)
  6. Pour into your prepared 9″ cake pan.
  7. Bake at 350 degrees F for 25-30 minutes, or until a toothpick inserted in the center comes out clean.
  8. Place on a cooling rack in the pan for 10 minutes to cool slightly before turning out onto a plate.
  9. While the cake cools slightly, mix up your lemon honey syrup (see below)
  10. After 10 minutes cooling in the pan, turn the cake out onto a plate or cake stand and brush with the still-warm cake with lemon honey syrup.
  11. When the cake has cooled completely, top with glaze.

For the Lemon-Honey Syrup:

  1. Stir together lemon juice and honey. Brush over the cake when it’s still quite warm (as soon after removing the cake from the cake pan as you can). Let cake brushed with syrup cool completely before adding the glaze.

For the Lemon Glaze:

  1. Sift powdered sugar into a large bowl. Add lemon juice, milk, and vanilla. Whisk or beat until smooth. (Ideally, you want the glaze to be opaque and to hold its shape when it drips down the sides of the cake. If yours is too thin, add more powdered sugar 1 Tbsp at a time. If it’s too thick, add more milk 1 teaspoon at a time until you reach the right consistency.)
  2. Pour glaze over your cooled cake and gently spread it toward the edges. Let some of the glaze run down the sides. Let set completely before cutting and serving.

NOTES

You can absolutely make this in a stand mixer or food processor instead of in a mixing bowl. Your preference!

*To cut a parchment circle, I trace the bottom of my cake pan on parchment paper, then cut it out. It’ll be the perfect size!


Tuesday, November 24, 2020

Give thanks to the Lord


Always Give Thanks


No Bake Pumpkin Cheesecake


6.5 hours · Vegetarian · Serves 12 · Easy, creamy no-bake pumpkin cheesecake is perfect for fall! Crunchy graham cracker crust and delicious pumpkin spice flavor


11 ingredients


Produce
  • 2 cups Pumpkin puree

Baking & Spices
  • 1/2 cup Brown sugar
  • 1/2 tsp Cinnamon
  • 1 1/2 cups Graham crumbs
  • 1 cup Powdered sugar
  • 1 tbsp Pumpkin pie spice
  • 2 Tabelspoons brown sugar
  • 2 tsp Vanilla extract
Dairy
  • 6 tbsp Butter, unsalted
  • 24 oz Cream cheese
  • 2/3 cup Heavy cream


Cinnamon Graham Cracker Crust

The graham cracker crust is made with graham crumbs, a little brown sugar, just a hint of cinnamon & melted butter. You can either buy graham crumbs in the baking aisle of the grocery store or buy graham crackers and blitz them in your food processor (or by hand).


Pumpkin Cheesecake Filling

Then it’s time to get on with the creamy pumpkin cheesecake. It’s made without gelatin – which I totally love – and is oh so smooth.

Before getting started, blot the pumpkin puree with a paper towel and squeeze out the excess liquid. This step is super important because if too much liquid gets into the cheesecake, it can have a hard time setting. 


Then to make the filling:

  1. Beat the whipped cream until stiff peaks form.
  2. Then in a separate bowl beat the cream cheese until soft. Then mix in the sugars and pumpkin spices.
  3. Mix in the pumpkin puree and vanilla extract.
  4. Then gently fold in the whipped cream. The key here is gentle. You want to keep the volume of the whipped cream so that the cheesecake stays light and fluffy.
The creamy pumpkin cheesecake goodness then gets spread over top of the crust and then it goes into the fridge to chill for at least 6 hours (or preferably overnight). 

Tips for Making this Pumpkin Cheesecake

  • I recommend using a 9-inch springform pan. A 10-inch springform pan will also work too.
  • Make sure to use full fat, brick-style cream cheese. If you use other cream cheese types – it may not set properly.
  • If you prefer cool whip instead of whipped cream, feel free to use it instead. Measure out 1 cup, and fold it into the pumpkin mixture at the end.
  • Make sure to use 100% pure pumpkin and not premade pumpkin pie filling. Pumpkin pie filling has a bunch of other ingredients that we don’t need in it.
  • If your cheesecake doesn’t seem to be firming up enough, place it in the freezer.
  • On that same note – this cheesecake freezes well. Then thaw it in the fridge.

This pumpkin no-bake cheesecake is the perfect combo of creamy cheesecake goodness and pumpkin pie. Plus – it’s perfect for Thanksgiving because it doesn’t even take up any oven space.