Friday, October 6, 2017

Fall Decorating Ideas

Most of these are from Pinterest and look fairly easy.
Happy Fall!
» 10 Things I Love About September
I've decided to do this this year, but instead of "Fall" or "welcome," they will say "gourd" and "Pinteresty AF"

100 Cheap and Easy Fall Porch Decor Ideas - Prudent Penny Pincher

Tuesday, April 4, 2017

Beauty and the Beast Cupcakes

Beauty and the Beast Cupcakes
CREDIT
Thought these were adorbs! Click on the Credit link and it will
take you to Cupcake Diaries and the recipes :)

Friday, March 24, 2017

Easy Crock Pot Potato Soup

Another yummy-sounding recipe from
Pinterest!


Ingredients: 
1 30oz. bag of frozen diced hash browns
1 32 oz box of chicken broth
1 can of cream of chicken soup (10 oz)
1 pkg. cream cheese (8 oz, not fat free)
3 oz bacon bits 
1 cup shredded cheddar cheese 
salt and pepper to taste 

Directions:
Put the hash browns in the crockpot.  Add in the chicken broth, cream of chicken soup and half of the bacon bits.  Add a pinch of salt and pepper.  
Cook on low for 7-8 hours or until potatoes are tender.  
An hour before serving, cut the cream cheese into small cubes.  Place the cubes in the crock pot.  Mix a few times throughout the hour before serving.  
 Once the cream cheese is completely mixed in, it's ready to serve.  
Top with cheddar cheese and some additional bacon bits.  

Tuesday, March 21, 2017

TACO PIZZA ROLLS

Saw this yummy appetizer on Pinterest at The Girl Who Ate Everything
It looks good-definitely on my try list for my family. 

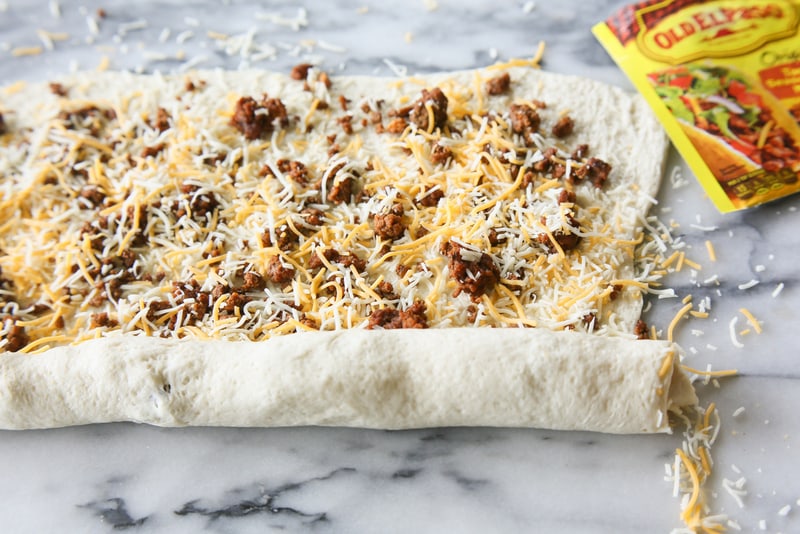
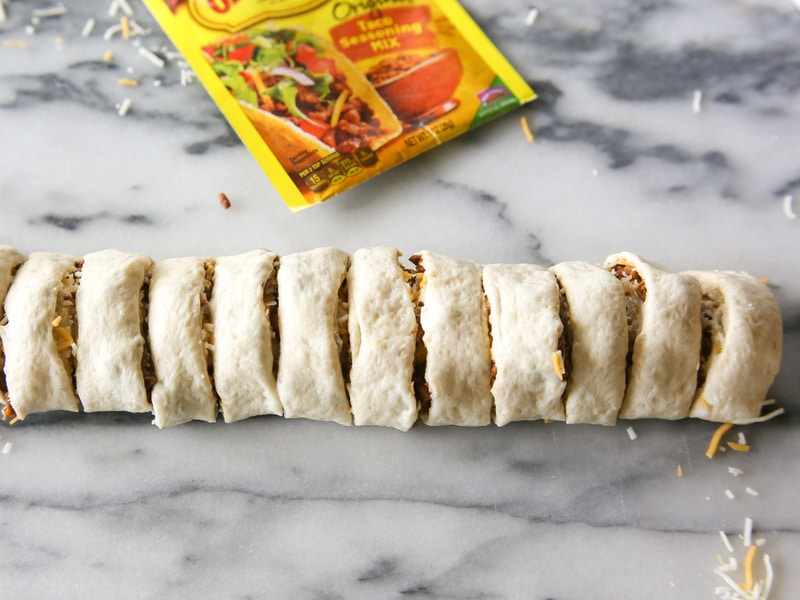
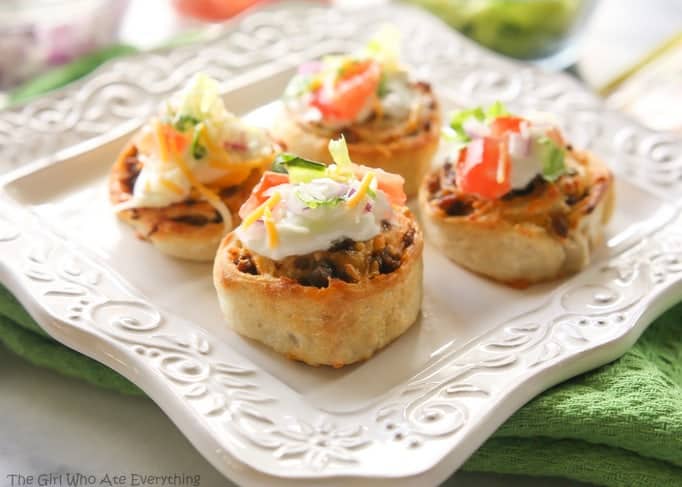
Taco Pizza Rolls - taco meat and cheese rolled up in pizza dough and topped with your favorite taco toppings. the-girl-who-ate-everything.com

Taco Pizza Rolls - taco meat and cheese rolled up in pizza dough and topped with your favorite taco toppings. the-girl-who-ate-everything.com


Credit

Taco Pizza Rolls
Print
Serves: 18 taco rolls
Ingredients
  • ½ lb ground beef
  • 1 can Pillsbury refrigerated classic pizza crust
  • 2 tablespoons Old El Paso™ taco seasoning mix (from 1-oz package)
  • 3 tablespoons water
  • 1 cup shredded Mexican blend cheese
  • Optional toppings: lettuce, tomato, sour cream, onion, and guacamole
Instructions
  1. Preheat oven to 400 ° and lightly spray a baking sheet with cooking spray.
  2. In a medium skillet, cook and brown beef until no longer pink. Drain. Add taco seasoning and water and cook for 2-3 minutes. Set aside and cool slightly before using.
  3. Take pizza dough out of its package and unroll it onto a flat surface. Slightly roll or press the pizza dough out into a rectangle.
  4. Add the taco meat evenly on top of the pizza dough. Sprinkle the cheese evenly on top.
  5. Starting with the long edge of the pizza dough, roll dough tightly up into a roll. Using a serrated knife, make about 1-inch slices along the roll, making about 18 rolls.
  6. Place rolls on prepared baking sheet. Bake for 10-12 minutes or until tops are golden brown.
  7. Serve immediately and top with desired toppings.
Notes
Source: The Girl Who Ate Everything

Want to prepare ahead of time? These taco rolls can easily be made ahead of time and frozen until you need them.

Taco Pizza Rolls - taco meat and cheese rolled up in pizza dough and topped with your favorite taco toppings. the-girl-who-ate-everything.com

Thursday, March 16, 2017

GLUTEN-FREE PULL-APART DINNER ROLLS


Gluten-free Dinner Rolls recipe. These will remind you of Grandma's rolls at the holidays!

GLUTEN-FREE PULL-APART DINNER ROLLS
 
Recipe from: 
Recipe type: Yeast Breads/Rolls
INGREDIENTS
INSTRUCTIONS
Report this ad
  1. In the mixing bowl of your electric mixer, mix together flour, xanthan gum, instant yeast, sugar, and salt.
  2. With mixer running on low speed, add in the water, melted butter (or substitute), egg, and cider vinegar.
  3. Mix on medium speed 3 minutes.
  4. Spray 8" or 9" round cake pan or pie plate with cooking spray. Using a 2" scoop or 1/3 cup measuring cup, scoop dough into 9 mounds in the pan. I place one mound in middle, then scoop 8 mounds of dough side by side all the way around the pan.
  5. Dip your fingertips into warm water and use to smooth out the tops of the rolls, continuing to wet fingers as needed.
  6. Cover with a dry towel and let rise in a warm place 45 minutes to 1 hour.
  7. During the last few minutes that the rolls are rising, preheat oven to 400°.
  8. Bake in 400° oven for 26-28 minutes. Tops should be golden brown and if you measure temperature of dough, it should measure 200°.
  9. Brush rolls with additional 1/2-1 Tablespoon of melted butter.
NOTES
Please see blog post for information on egg-free and dairy-free substitutions. If you would like to use a different flour blend, please read through the reader comments below to see what flour blends have worked well for other readers! Make sure you measure the flour by weight!

Thursday, March 9, 2017

Meatball Sliders

I saw this on pinterest and want to try it!

These cheesy Meatball Sliders are an easy appetizer recipe for game day. Make them for your next party!:

Ingredients

Condiments

  • 2 cup Spaghetti sauce

Spices

  • 1 tbsp Italian seasoning

Oils 

  • 2 tbsp Olive oil

Bread 

  • 15 Hawaiian buns

Dairy

  • 2 cup Mozzarella cheese
  • 3 tbsp Parmesan cheese

Frozen

15 Meatballs, cooked


put the bottoms of your slider rolls in a casserole dish and cover them with your spaghetti sauce. Next add your cooked meatballs (and a little more sauce because you can never have enough!). Then top them with lots of mozzarella cheese. Place the top slider buns over the meatballs and brush them with olive oil and sprinkle them with mixture of Italian seasoning and Parmesan cheese.
Cover the dish with aluminum foil and bake for 10 minutes covered, then remove the foil and continue baking for another 10 minutes. You end up with mini meatball subs oozing with stringy mozzarella cheese

Wednesday, March 8, 2017

Tuesday, March 7, 2017

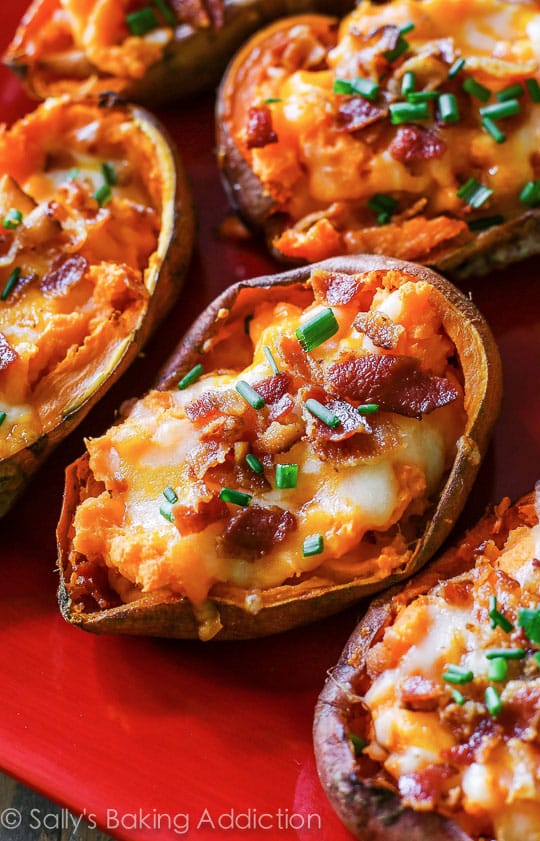
Gluten Free Loaded Sweet Potato Skins

I saw this gluten free recipe on pinterest...looks so yummy!


Loaded Sweet Potato Skins

Enjoy a big plate of extra crispy, extra loaded sweet potato skins in no time! This game-time favorite is hard to resist.
Yield: 8 potato skins, may easily be doubled or tripled for a crowd
Simply Loaded Sweet Potato Skins - what a great snack or side for game day!

Ingredients:

  • 4 medium sweet potatoes
  • 1 Tablespoon olive oil
  • 1/4 cup milk1
  • 1/4 teaspoon salt
  • ground pepper, to taste
  • 1 cup shredded cheese (I use half sharp cheddar and half mozzarella)
  • 4 strips bacon, cooked until crispy, and crumbled
  • sour cream and chopped chives for serving

Directions:

  1. Preheat oven to 400F degrees. Line a large baking sheet with parchment paper or a silicone baking mat. Pierce each sweet potato a few times and bake for 40-50 minutes or until soft. Allow the potatoes to cool slightly. Slice potatoes in half lengthwise.
  2. Reduce oven temperature to 375F degrees. Scoop out sweet potato flesh, leaving a thin layer of sweet potato inside, and add flesh to a medium bowl. Place skins back on the baking sheet face up, drizzle with olive oil and bake for 10 minutes.
  3. Mash the sweet potato flesh with milk, salt, and pepper until smooth and creamy. After 10 minutes, remove the skins from the oven. Fill each with an equal amount of mashed sweet potato and top each with cheese. Bake for 15 minutes until the cheese is melted. Remove from the oven and top with bacon. Serve with sour cream and chopped chives, if desired.
  4. Skins are best enjoyed immediately. Cover leftovers tightly and store in the refrigerator for up to 3 days.

Recipe Notes:

  1. Buttermilk, whole milk, or half-and-half is best. Try to avoid low fat milks. You want a very thick, creamy mash.

Sunday, February 12, 2017

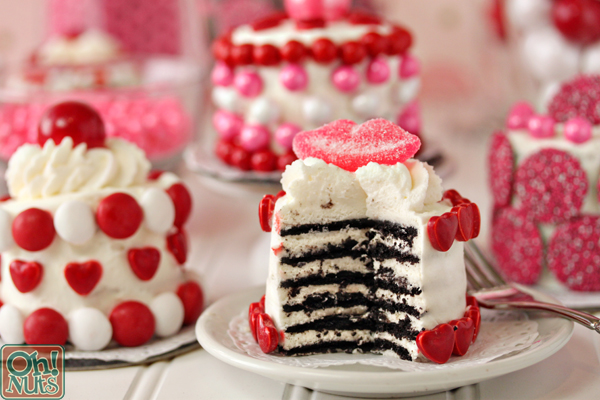
Easy Valentine Cakes


Easy Valentine’s Day Mini Cakes
yield: 8 small cakes

Ingredients

  • Easy Valentine's Day Mini Cakes | OhNuts.com


  • 3 cups cold heavy cream
  • 3/4 cup powdered sugar
  • 1 9 oz package (about 48 cookies) chocolate wafers
  • Valentine’s Day candy! You can use whatever you like. I used:
  • Pink & white dark chocolate nonpareils
  • Valentine Sixlets
  • Mellocreme candy hearts
  • Red mini hearts
  • Sour lips
  • Valentine’s gumballs
  •  Red and white M&Ms
  • Combine the cream and powdered sugar in the bowl of a stand mixer fitted with a whisk attachment.
  • Whip the cream on medium-high speed until firm peaks form.
  • You can use a knife to spread the whipped cream between each layer of cookie, but if you have a piping bag, I recommend putting the cream in a piping bag fitted with a round tip–it’s faster and neater. Either way, spread a thin layer of cream on the bottom of a cookie, and place the cookie onto a plate, cardboard round, or other serving surface. After the cakes are assembled the cookies will soften into a cakey texture, so it’s difficult to transfer them later. I put mine on doily-covered cardboard rounds, so they were easy to serve individually.
  • Pipe or spread a thin, even layer of whipped cream on top of the cookie.
  • Top the first cookie with a second, and continue to layer cream and cookies until you have a stack of six cookies. (You can play with the height–I found that six cookies made a nice, tall cake that seemed substantial but wasn’t too overwhelming. You can find what height works for you!)
  • Pipe or spread more whipped cream along the top and outside of the cake.
  • Use an offset spatula or a knife to spread it into a smooth layer. The cake might shift around while you’re working on it, since whipped cream is delicate, so be gentle! Don’t worry about having a perfect finish, because you can always cover up any trouble spots with candy later on.
    After all of the cakes are assembled, refrigerate the cakes for at least 3 hours, to give the cookies time to soften. The cakes can be made several days in advance and kept, refrigerated, until you’re ready to decorate them.
  • Now for the fun part! Decorate the cakes with an assortment of Valentine’s Day candy, and additional whipped cream, if desired. Depending on the candy you choose, the coloring might start to seep into the whipped cream as it sits, so that’s why it’s best to decorate these shortly before you plan on serving them.

Best Valentine

Image result for valentine God